Thinking about giving your home a makeover? A fresh coat of paint can instantly revive any room, bringing warmth, energy, and personality into your space. But before you dip your brush into the can, proper preparation is absolutely essential. The difference between a professional-quality paint job and a patchy, uneven one lies in how well you prepare. With the right steps, your walls will look smooth, vibrant, and long-lasting, giving your room a polished and refreshed feel.
If your walls have multiple old paint layers or peeling spots, consider sanding paint off the walls to achieve a clean, even surface. Removing old paint not only improves adhesion but also helps the new color appear richer and more consistent. Sanding is especially crucial if your walls have glossy finishes, textured sections, or visible imperfections that could resist fresh paint.
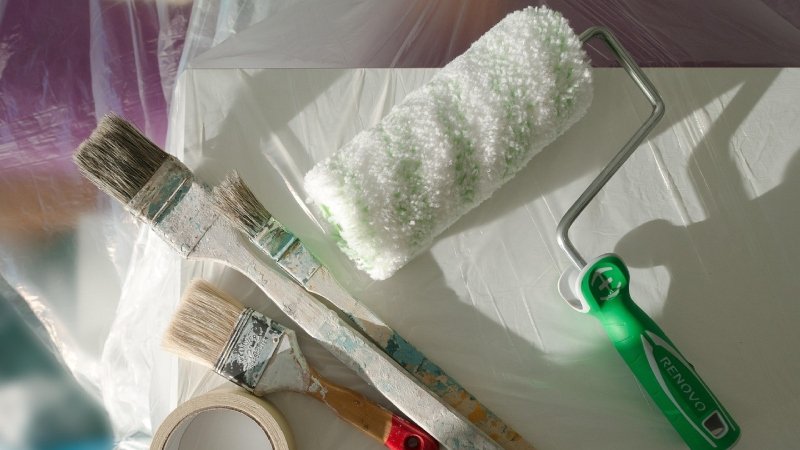
Step 1: Declutter, Protect, and Mask
- Start by removing as many items as possible from the room. Furniture, decorations, and wall art should be stored in another area to keep them safe from dust and paint splatter.
- For larger or heavy pieces, move them to the center of the room and cover them tightly with plastic sheeting or old linens.
- Lay down heavy-duty drop cloths to protect floors from accidental spills. Use painter’s tape to secure the edges so they don’t shift.
- Remove light fixtures, outlet covers, and switch plates. Keep small screws and parts in labeled bags so you can easily reassemble later.
- Carefully tape along the trim, baseboards, window frames, and door casings. Press tape edges down firmly to prevent paint bleed.
- Take time to mask off any areas you want to protect like vents, thermostats, or built-in shelving—to save cleanup time later.
Step 2: Clean Surfaces Thoroughly
A clean wall is a paint-ready wall. Even invisible dust, oils, or residue can prevent paint from adhering properly.
- Start by dusting from top to bottom tackling ceiling corners, baseboards, and trim first before wiping down walls.
- Wash walls using warm water mixed with a mild detergent or vinegar solution. In kitchens or bathrooms, a degreaser may be needed to cut through grime.
- Rinse thoroughly and allow the walls to dry completely before moving forward.
- Pay special attention to stains caused by smoke, crayons, or water damage; treating them now prevents them from bleeding through your new coat.
- Once dry, inspect your walls again if any residue remains, repeat cleaning lightly until you achieve a spotless surface.
Step 3: Repair, Patch, and Sand Smooth
Perfect paint begins with a perfect surface.
- Fill all holes, cracks, and dents using spackling paste or joint compound depending on the size. For deeper imperfections, use drywall tape for reinforcement.
- After the repair compound dries, sand each patch with fine-grit sandpaper until it blends seamlessly with the wall.
- Check for texture inconsistencies if necessary, apply texture spray or a thin skim coat to maintain uniformity.
- When sanding is complete, vacuum the entire surface and wipe it down with a tack cloth to remove any dust. A dust-free wall is critical for strong paint adhesion.
- For older homes, test for lead paint before sanding to ensure safety. Use protective gear such as a mask and goggles during this stage.
Step 4: Prime for Uniform Coverage and Adhesion
Primer acts as the foundation for your paint, ensuring color uniformity and helping the topcoat adhere properly.
Select a primer designed for your wall type:
Stain-blocking primer for smoke, tannin, or water stains.
Bonding primer for glossy or slick surfaces.
High-build primer to even out small imperfections.
- Tint the primer slightly toward your chosen paint color. This trick enhances coverage and reduces the number of topcoats required.
- Use a roller for broad areas and a brush for corners and edges. Apply in smooth, even strokes.
- Allow the primer to dry thoroughly—usually 2–4 hours or as directed by the manufacturer. Insufficient drying time can compromise the final finish.
- Lightly sand the primed surface before painting for the smoothest result.
Step 5: Control the Room Environment
Your painting environment can greatly affect results.
- Maintain room temperatures between 60°F and 80°F and moderate humidity levels to encourage even drying.
- Proper ventilation is key: open windows and use a fan to circulate air, pointing it outward to remove fumes.
- Avoid painting in overly humid or dusty conditions; these can cause uneven texture or poor adhesion.
- Opt for low- or zero-VOC paints for an eco-friendly and healthier painting experience—especially important in bedrooms or nurseries.
- Use dehumidifiers or space heaters to control the environment if weather conditions aren’t ideal.
Step 6: Final Pre-Paint Checklist
Before opening that can of paint, go through this quick checklist:
- Use a bright work light to scan walls for missed flaws. Re-sand or patch as needed.
- Double-check that all painter’s tape is firmly pressed down.
- Stir or shake your paint thoroughly for consistent texture and color.
- Set up your painting tools—rollers, trays, liners, angled brushes, extension poles, rags, and extra gloves—so everything is within reach.
- Keep damp cloths handy to immediately wipe up any spills or drips.
- Make sure you have enough paint for two full coats before starting.
Pro Tips for a Flawless Finish
- Cut in first, then roll: Brush around edges and corners before rolling the main surface to maintain a wet edge.
- Use the correct roller nap: Short for smooth walls, medium for lightly textured, long for rougher surfaces.
- Avoid overloading your brush or roller, which can cause drips and uneven coverage.
- Respect drying and recoat times listed on the paint can to ensure durability and a uniform sheen.
- Work in natural daylight when possible to better see color accuracy and streaks.
- Label leftover paint with the room name, brand, color code, and date for future touch-ups.
- Clean tools immediately after use—this not only extends their life but ensures better performance for your next project.
With careful preparation and patience, your new wall color will go on smoother, look brighter, and last much longer. Investing time in prep work not only enhances your results but saves you from costly do-overs later. The more thorough you are before painting, the more rewarding your final transformation will be—turning a simple DIY project into a space that truly feels brand new. Visit World Mapquest for more details.